Showing posts with label China Glaze. Show all posts

Sunday, February 10, 2013

Valentine's Day Nails--Day 9

Oops! I'm a day late for Day 9 :/ That's ok, I'm sure you guys will forgive me, right??


What I used:
China Glaze Hang-Ten Toes (3 coats)
Milani Rapid Cherry
Bundle Monster plate BM-317
Multi-sized multi-colored round rhinestones from Cult Nails

These nails were hard to photograph! I couldn't get Hang-Ten Toes to come out true to color. It's way more neon in real life.


Sunday, November 25, 2012

China Glaze Glistening Snow stamped

Recently I bought a cute china glaze holiday gift set that included two china glaze polishes and a shot glass! One of the polishes in the set was Glistening Snow!

This is two coats of Glistening Snow, notice how it dries kind of matte! I think it looked really awesome on its own...but I wanted to stamp over it.

I stamped with Wet n Wild Black Creme and I used bundle monster plate 320! It's like a faux water marble effect.


I don't really have much else to say about this mani....I really loved it though! I hope all of you that celebrate Thanksgiving had a wonderful holiday! I ended up not doing themed nails :/ Oh, well. I'll try and do lots of Christmas nails this year to make up.

Hope you all have a great Monday tomorrow! :)

Monday, October 8, 2012

China Glaze Make a Spectacle

Well hello, long time no talk! School got a little overwhelming last week and I honestly took no time to focus on my nails. I've really neglected them lately, and it shows :( If you follow me on instagram, then you know that I cut my nails down some because I couldn't handle them being so long anymore! I kept accidently scratching myself and I was having trouble typing. I really liked the length that I cut them down to, but then something happened...

One day my mani was chipping really bad, so what did I do? Sit in class and peel the crap out of them. Of course doing that made my nails extra peely and weak, that, then led to my pinky breaking so short that it was painful. And now I am to super nubs for nails lol! I'm not that upset because nails grow back. But, they just aren't that pretty right now! You'll see what I mean below.

Base is one coat of Cult Nails Nevermore. Then I added one coat of China Glaze Make a Spectacle.

Make a Spectacle is new from China Glaze for their Halloween collection. It's the only polish I picked up from the collection. I love it! It looks awesome over black; it's got like a green sheen going on...I dig.
 
Again, I'm sorry for the short and sporadic posts. School has gotten a little intense. All of my assignments have been piling into the same weeks and now this week I have a test to study for. So just bear with me :)

Sunday, September 9, 2012

80's Earrings nail art #2

Hey guys! Remember this post from a few months ago? Well, I'm back with more!
 
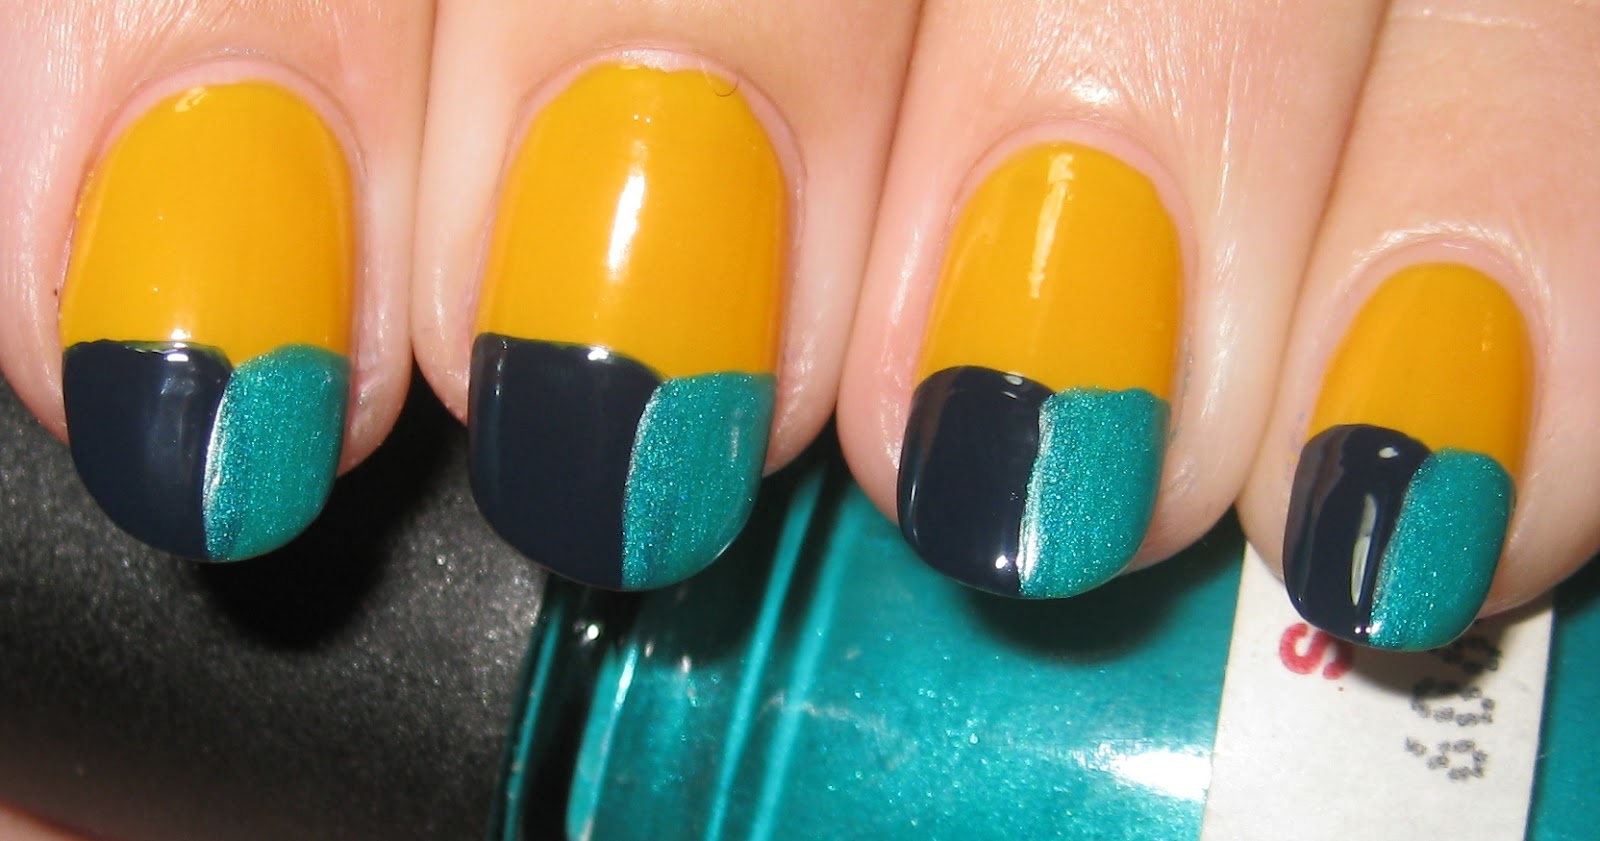
Here is how they turned out:
 
 
And here are the earrings I was inspired by:

 
These earrings are my personal favorites from all the pairs that I found that day! They are so colorful and fun.
 
 
Here are the supplies I used for the details in the design:
 
For the fine line detailing I did with the pink and green I used two of my migi nail art pens, they have a super fine tip (see below) and are great for drawing lines. I used my nail art brush to do the turquoise swirlies and to paint the navy and turquoise sides at the bottom of the nail. Lastly, I used my dotting tool for the dots.


Here's a quick step by step on how I did these nails:
 
I started with two coats of Spoiled by Wet n Wild Designated Driver

Then, using my nail art brush, I first painted the left side of my nail, about half way down, with a navy polish (Avon Empower). I painted the right side with a turquoise polish (Chin Glaze Turned Up Turquoise) using the same technique.

Lastly, I went in and did the detailing. I used my nail art brush and the turquoise polish and did little swirlies at the top of each nail. I used my pink migi nail art pen to do the crooked line under the swirly. All the dots were done with a dotting tool. And the little green arrows you see on the left side of each nail were done with my lime green migi nail art pen.
WHEW, that was a lot to say, I hope I didn't lose anyone!
 
As you can see, I didn't do the EXACT design of the earrings.

If any of you ever attempt to do designs inspired by objects or other designs you see, just know it doesn't have to be perfect! You can see that some of my lines are wonky and stuff isn't placed exaclty so, but that's what adds to the appeal of these nails! And if you look closely, you can see that the earrings aren't perfect either!

These were really fun and crazy nails. I'd love to go to some 80's party or rave and re-create this look!


Monday, August 27, 2012

China Glaze I Herd That

China Glaze I Herd That is the only polish I grabbed from the On Safari collection. It's not that I didn't like the others, I just didn't feel compelled to buy any of them, except this gorgeous glitter.
 
I Herd That. Opaque in two coats. It's a gold glitter polish with flecks of red glitter and lots of holo glitter as well!
 
Here's a blurred pic to really show the holo glitter. So pretty!


Another slightly blurred picture
 
I really love the coppery-ness to this polish. It's not just straight up gold, it's got some depth to it. It dried slightly gritty, but I added a coat of Gelous and then finished it off with Cult Nails Wicked Fast and it was completely smooth and super shiny.
 
Did you guys pick this one up? What are some of your other favorites from the collection?

Tuesday, July 3, 2012

Orange You Hot? gets a dose of Captivated

I've been seeing a lot of people doing the gradient look lately so I thought I would give it a try!
The two polishes I used were China Glaze Orange You Hot? and Cult Nails Captivated.


While I was trying to take pictures of my nails, Marvin decided he'd like to help!

aaandd then he just wanted to play with the polish lol! See that Maria, everyone loves cult nails...even cats!

I started by painting two coats of Orange You Hot? and then let it completely dry.

Then I took a sponge makeup applicator and used it to dab on Captivated! I stopped before I covered my entire nail to create the gradient effect.

The final look was gorgeous. And this technique was super easy!


Friday, June 29, 2012

Realistic Snake Skin stamping

After doing my nails for yesterday's post I decided I wanted to try and create more realistic looking nails with the snake skin stamp!

Here's what I used:
L to R: Cult Nails In a Trance, Revlon Elegant, and China Glaze Mahogany Magic.

This is a sponge makeup applicator I used to create a sponged look for the base!

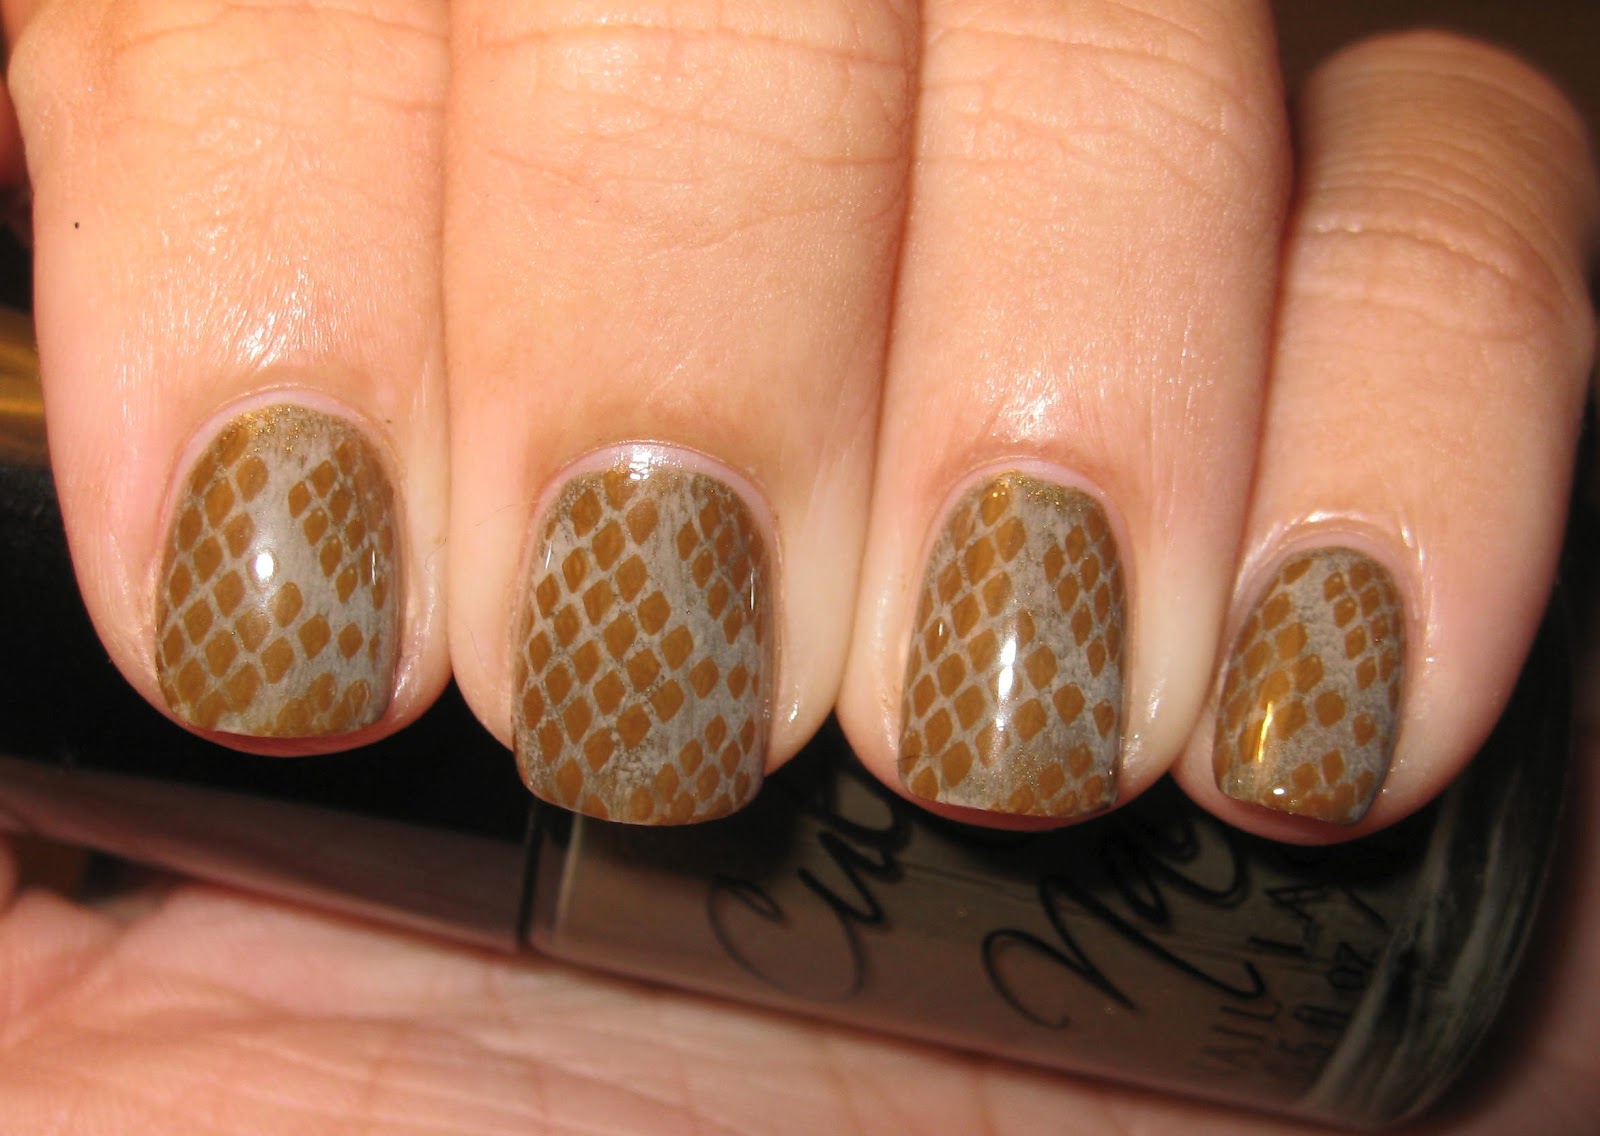
I started by painting one coat of In a Trance and then lightly sponging Elegant to lighten it and make the cool effect. I used Mahogany Magic to do the stamp with Bundle Monster plate BM-215.

Final Result: freaking cool!


I am so proud of these!


Next, I'm going to try and create a realistic giraffe print :) !

Thursday, June 28, 2012

Neon Stamping!

This post contains two of my favorite things: the new China Glaze summer neons and animal print stamping!

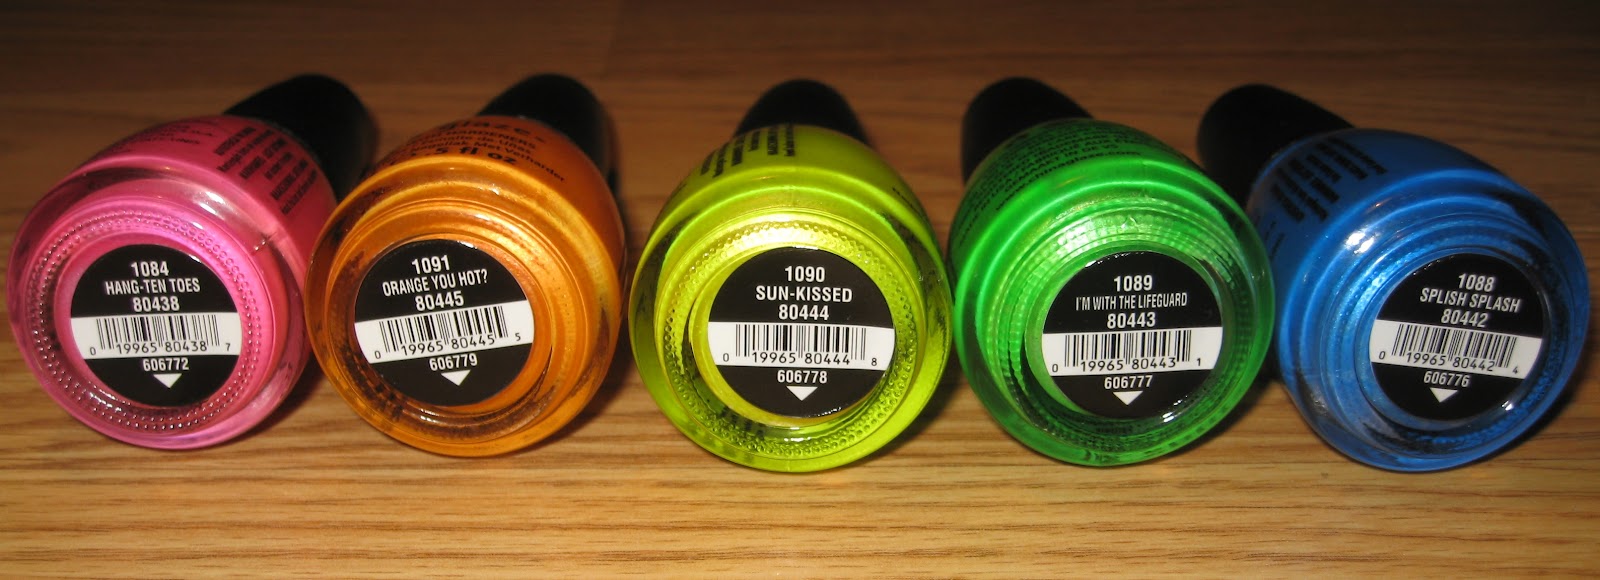
I chose these 5 as my base colors.

L to R: Hang-Ten Toes, Orange You Hot?, Sun-Kissed, I'm With the Lifeguard, and Splish Splash

Here's the stamping plate I used. This plate somes from Bundle Monster's second set of stamping plates. I used the giraffe print on my left hand and the snake skin print on my right!


My neon skittles before I stamped over them! These are my favorite neons that I own because of their beautiful shimmer.

Here is my left hand with the giraffe print! The polish I used to stamp with was Cult Nails Nevermore and that's the polish that I'm holding here.

My right hand and my favorite! I'm in love with the snake skin print.


All of my stamps came out clean and crisp. That's due to Bundle Monster having great plates and because Nevermore is so nice and opaque. You will notice though that for my giraffe nails the print looks a little see-through, that is because when I scraped the polish off before transferring it to the stamper...I scraped a little too hard therefore taking too much polish out of the stamp. Even though I love to do it, stamping can somtimes be a pain....I just need extra practice :)


Stay tuned for my posts the next few days where the snake skin and giraffe print will make another debut!!!!


*This stamping plate was provided for me by Bundle Monster for review.

Thursday, June 7, 2012

Neon/Striping Tape fun!

A few nights ago I decided to paint my nails a fun neon color. This was still when the weather was perfect and I was soaking up the sun. On Tuesday, the weather decided to turn to shit here in FL and I haven't had any good beach days since :( Maybe posting my fun neon nails will make the sun come back tomorrow!!

I started with two coats of Spoiled I'm so Jaded, as my base. This beautiful polish is neon lime green with gold/yellow shimmer.
I decided to buy this polish back when Steph, from Imperfectly Painted, featured it on her blog in this post. I don't normally wear greens, but this I am in love with.
A gorgeous beach day to show off my neon nails <3 (I want this weather back now!!)
Then I spruced up this mani by doing some cool stripes on my thumb and ring finger using my new striping tape (which I'll talk about below) and China Glaze Flip Flop Fantasy!

I just placed the tape in the design that I wanted and painted one thick coat of Flip Flop Fantasy over it and peeled the tape off while the polish was still wet! I loved the effect.
Here is the striping tape that I am talking about...it's very thin tape that comes in pretty colors. I've seen some awesome manis where girls leave the tape on for stripes, as well as using it to create crisp lines, like I did.
I bought a pack of 10 of these on ebay for $0.99 with no shipping charges!! The pack came with silver, gold, white, blue, red, purple, etc!


I'm really excited to create tons of cool nail designs with this stuff! Stay tuned :)

Sunday, May 13, 2012

Happy Mother's Day!

Happy Mother's Day to all the Mommas out there!

My mom is one of my best friends and I really don't know what I would do without her, this post is dedicated to her today <3

My boyfriend and I took her to breakfast this morning and in a little bit we are leaving to take her to dinner also! It's been a day of laziness and eating, my favorite type of day lol!

So, onto my nails:

I found a new display of Maybelline's at Wal-Mart a week or so ago and I came home with only one! There were so many new and pretty colors on this display, but I felt I had a lot of the same type of colors at home already...so I was choosy.

I started with two coats of Maybelline Denim Dash. This picture was taken without top coat.

As you can see it dries with a satin/matte finish.

Next, I did one coat of Nubar 2010 on each nail and then on my ring finger I did one thick coat of China Glaze Luxe & Lush!

2010 and Luxe & Lush are kind of similar, except Luxe & Lush has bigger pieces.

I really don't want to take this mani off! I'm in love with it. First of all, blue is my favorite color of polish to wear. And, second of all, the flake glitter make it so awesome looking!!! I'm head over heels lol!


Well I hope everyone is enjoying their Mother's Day and thanks to all the Mom's out there for doing what you do :) !